If you are like me, you may have fallen into the trap of flying with perfect weather. It can be so tempting to make the weather perfect with a few clouds floating around the sky.
With perfect weather you are missing out on so many important elements of flight such as wind. Do you think wind always lines up perfectly with the runway…. not a chance. This will add some real challenge to your next landing.
Besides being more realistic, there is just something neat about flying in the actual weather that is happening outside. It really connects you to the outside world. Especially if you are making a cross country flight.
With real weather, you can actually plan your trip out properly. You can avoid the storms and fly where you have VFR. This doesn’t mean that you never get nice weather, you just have to do your research to find it.
How to Setup the Real World Weather in X-Plane 11.

Here is my Step by Step guide to the simple process of adding real world weather to your flight.
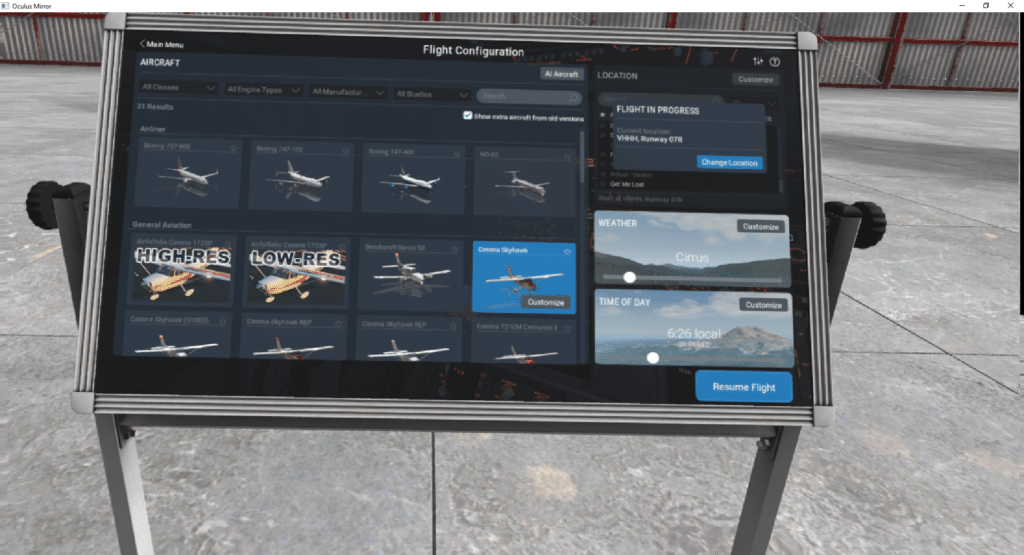
- Go to you’re settings menu
- The lower right corner of the screen you will see a weather box where you can slide the weather settings back and forth.
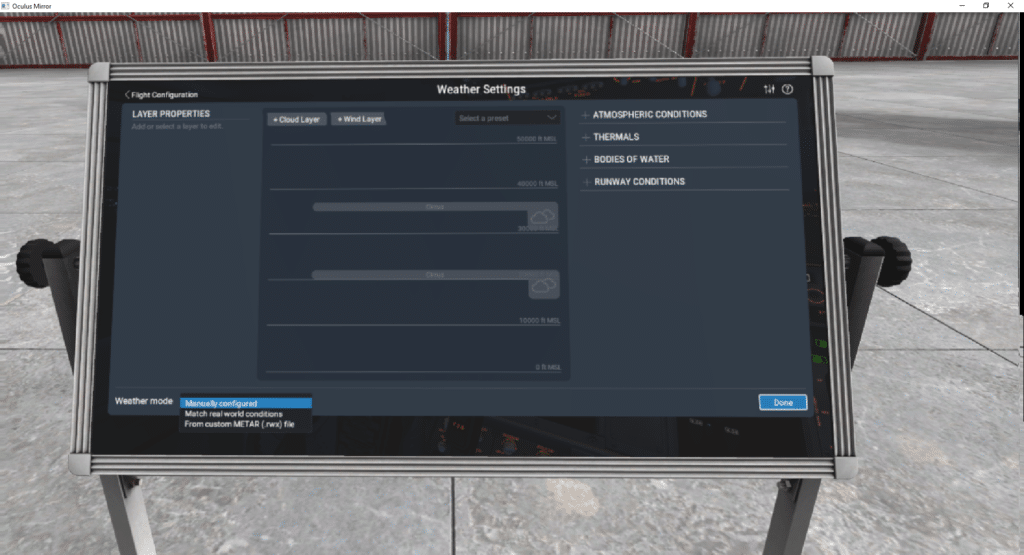
- Click on the customize button and go to the bottom left of your screen.
- In the bottom left you will find a Weather mode menu. This will have a drop down menu with several options.
- You will have the option to use manual configured weather, Match real world conditions or From custom METAR.
- Choose the Match real world conditions. This will give you actual real world weather for any airport that you choose.
- In the top right corner of the screen note that you can adjust the time it uses to change the weather. This is the time interval it uses before it downloads new weather data for the airport you are flying at.
This is going to add some serious realism and is worth any FPS/graphic sacrifice that has to be made in order to support the realistic weather.
Thanks for reading,
Dan
Leave a Reply