In this article, I am going to show you how to record your screen in Microsoft Flight Simulator 2020 step by step. I will walk you through each part of the process starting with installing some free software and getting it set up. You’ll be up and running in no time!
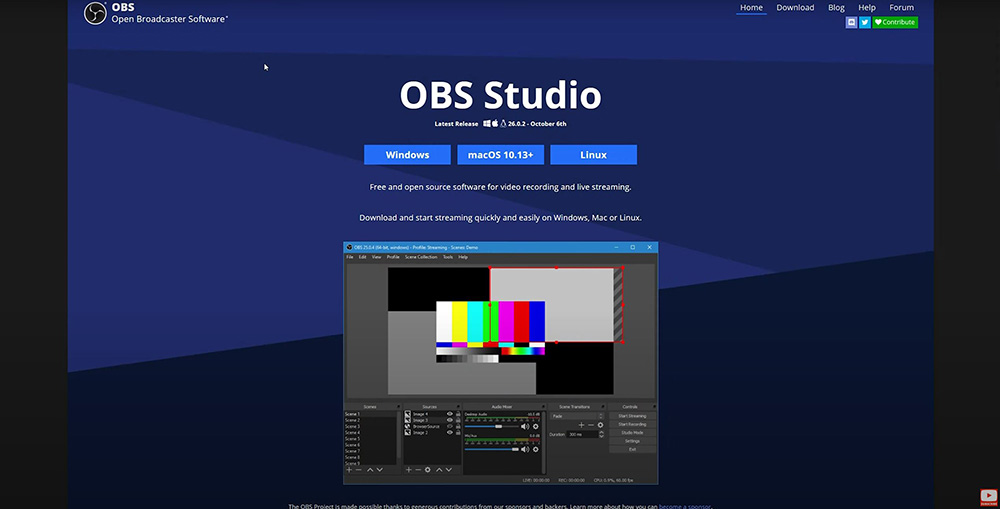
Install OBS
OBS is high quality software that many many people use. To begin, go to www.obsprojects.com click on ‘Windows’ and let it install. Most people using Microsoft Flight Simulator 2020 are using Windows, but if you are using a Mac just click the ‘Mac’ option.
Recording Path
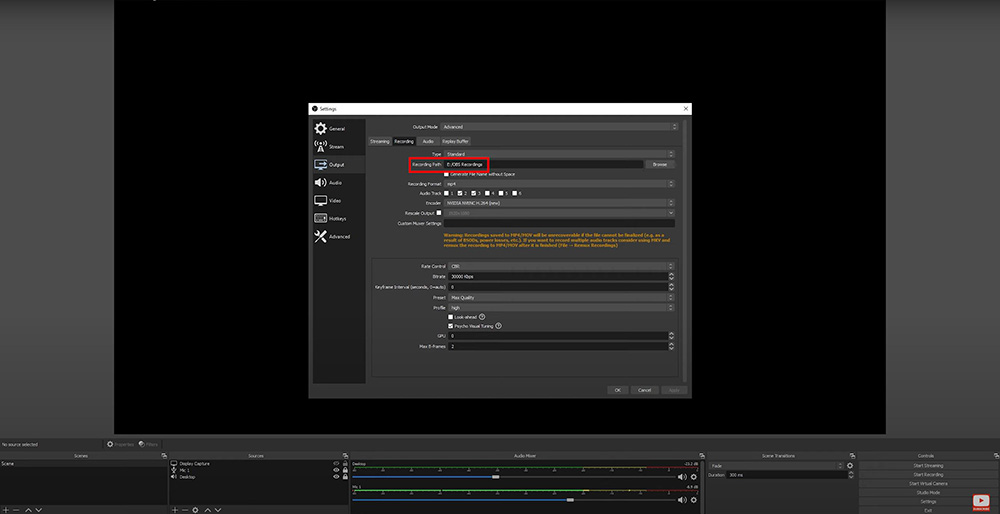
Once the installation is complete, you can go ahead and open OBS. Click on ‘settings’, ‘output’ and then ‘recording’.
Next you will need to set up a recording path. You can set yours up wherever is convenient for you, just make sure you choose a drive with plenty of room.
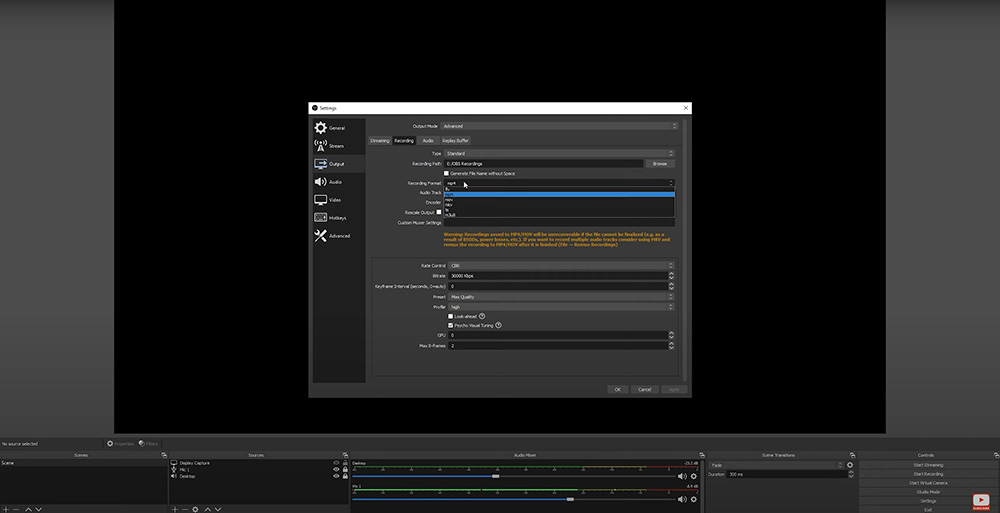
Select a Format
After choosing a recording path, you will need to choose a recording format. You can use either mkv or mp4. Mkv will allow you to recover the file if your computer crashes, but mp4 does not give you that luxury. The downside to mkv is that you will need to convert it to mp4 by using an OBS feature called ‘remux’.
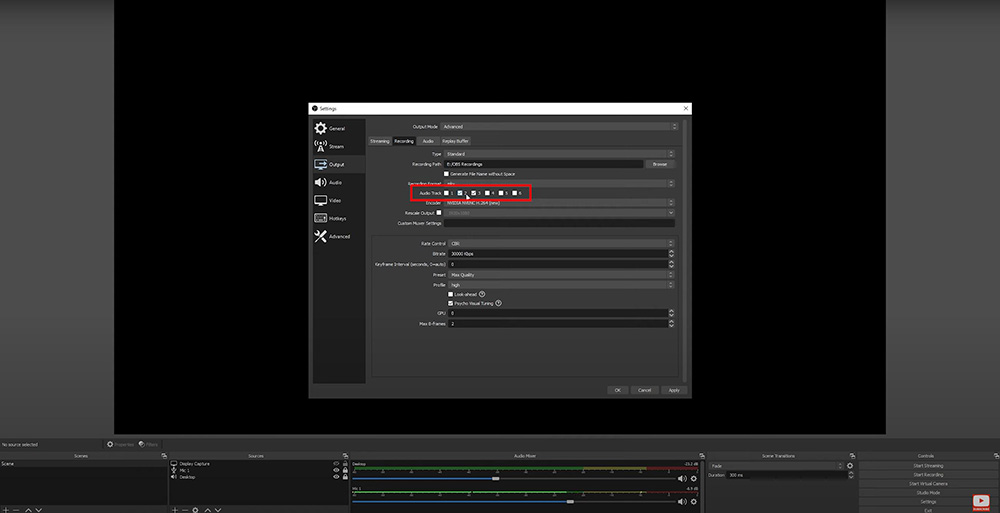
Audio Tracks Under Output
Next you will check off numbers ‘2’ and ‘3’. When not streaming it’s actually okay to check off ‘1’ and ‘2’, but I prefer using ‘2’ and ‘3’ just in case I decide to do some streaming. If you go to your ‘streaming’ tab you can set up ‘1’ as your audio track and leave ‘2’ and ‘3’ available for recording.
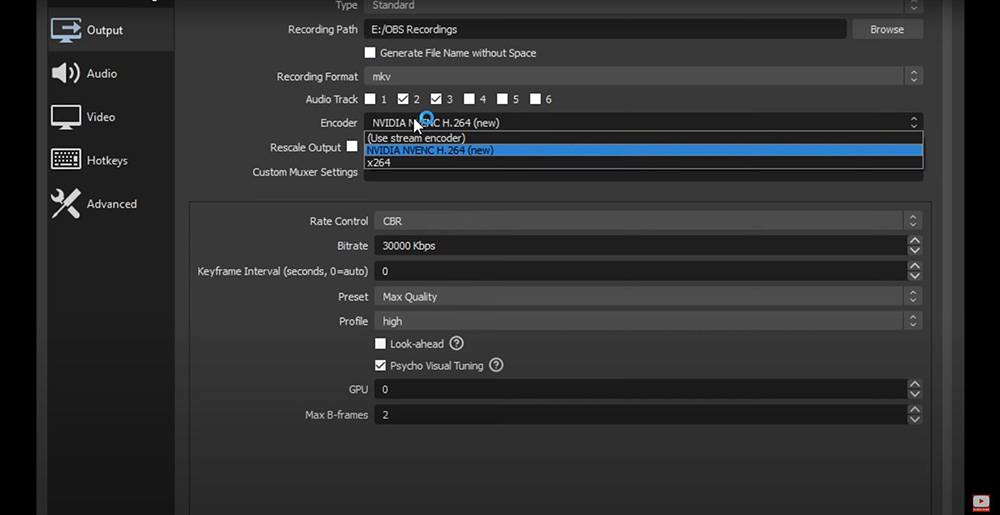
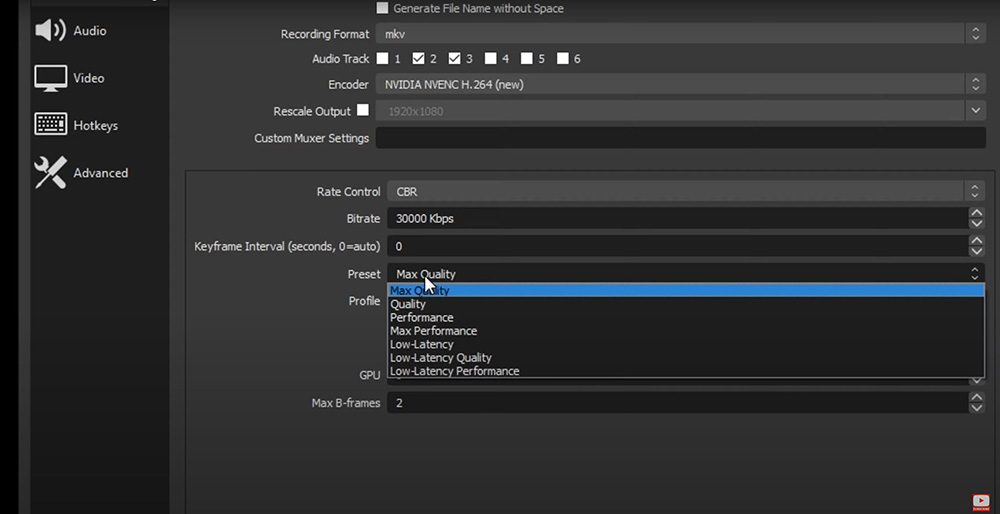
Most likely you have a graphics card if you’re running a simulator of this size, because you will need something able to handle it. In that case, you will go to ‘encoder’ and change that option (if you are able to) to ‘nvidia’ or if you have it ‘amd’. If you use ‘x264’ it will actually use your cpu.
Rate Control
The next, very important, step will be to change the ‘rate control’ setting. Rate control determines the way in which your bit rate is used to record your video. So, there are going to be a few different options you can choose from. For the highest quality, ‘lossless’ would be the option to choose.
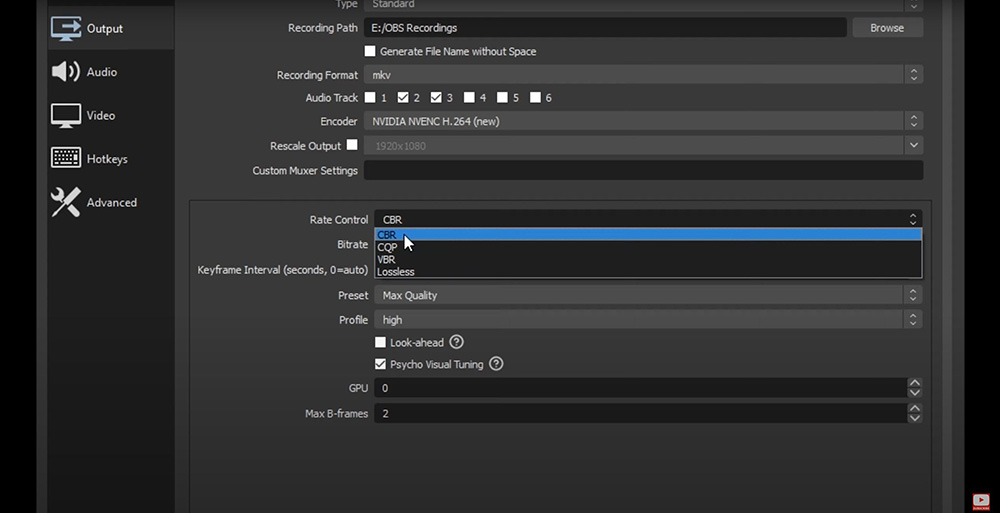
I find ‘CBR’ to be the best choice. ‘CBR’ gives a ‘constant bit rate’. This gives you a nice steady Bit Rate. I will talk about bitrate next.
Bitrate
If you go to YouTube’s help page, you can see what bitrate they suggest. A ‘bitrate’ is essentially the amount of data you are putting through to your video. The lower the ‘bitrate’ the grainier the image.
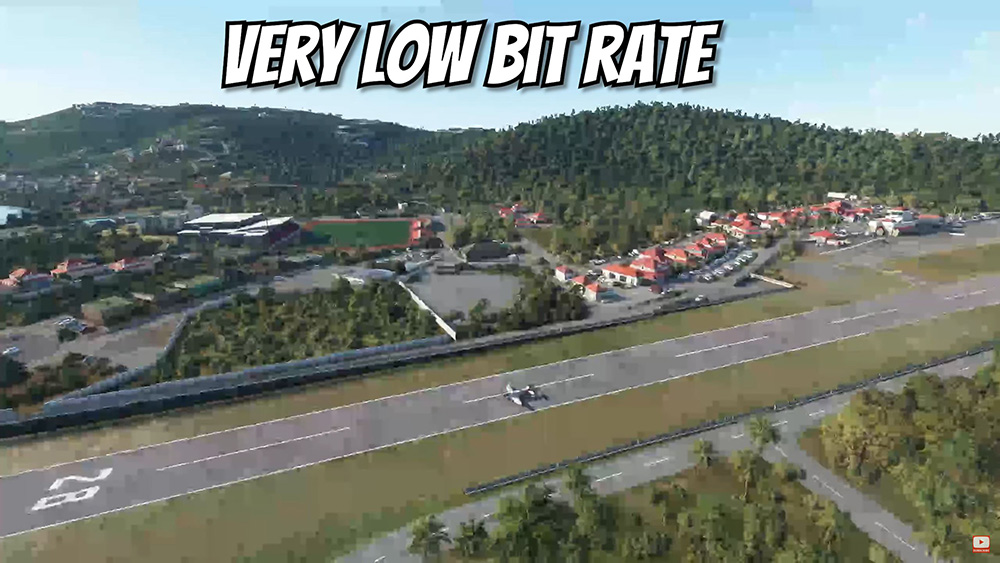
Still, higher doesn’t necessarily mean better. Usually, if I record at a very high bitrate and try to upload it to YouTube, I get a lower quality image when things are moving quickly. I believe this is happening because YouTube applies there own compression to the video. It also gives me a longer upload time. This is why I decided to play it safe and stick with YouTube’s recommendation. This seems to be the best.
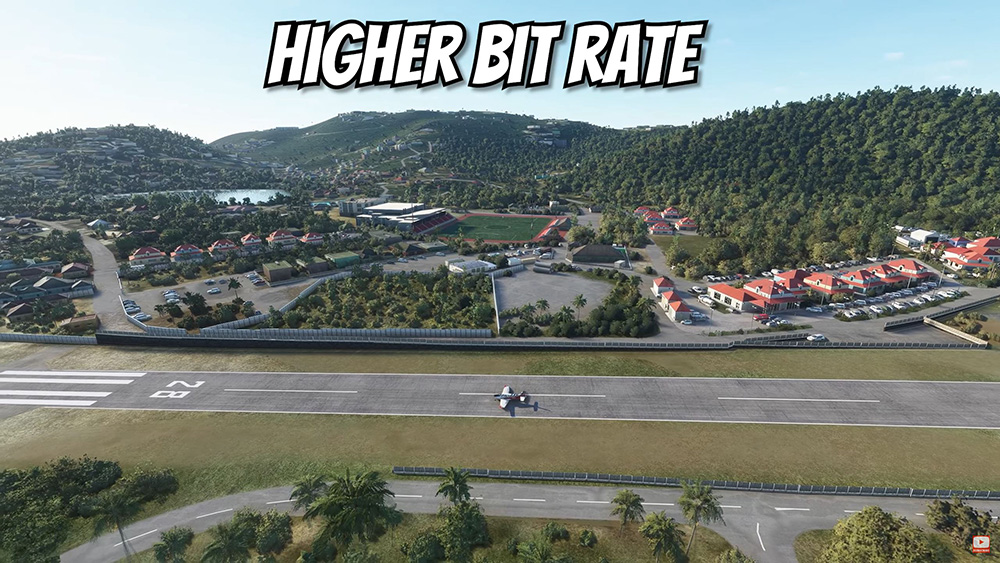
How To Pick Your Bitrate
From YouTube’s help page choose the resolution you have on your monitor from the resolution list. If you have a 2k monitor, go to 2k. Then you will slide over, and depending on the frames per second you are recording at, choose your bitrate. After finding our bitrate, we will go back to the recording menu and enter the bitrate into the bitrate column.
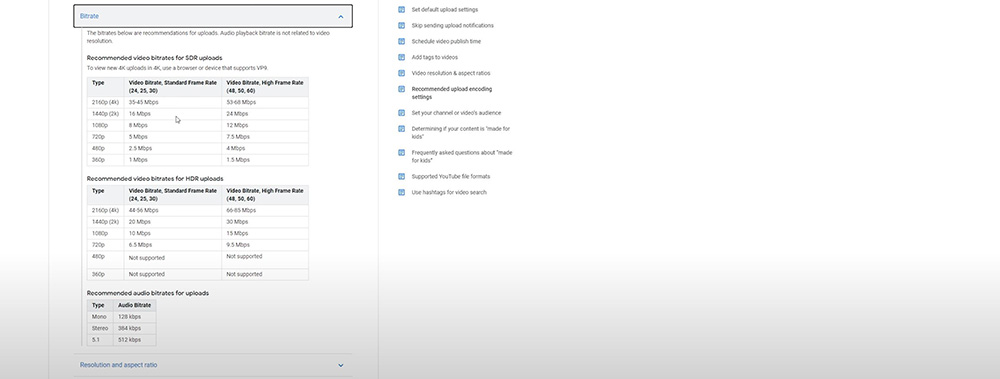
*Note: If you are using a 2k monitor for example, and your bitrate suggestion is 30mbps, when you enter it into the ‘bitrate’ column it will actually say 30,000kbps which is equal to 30mbps*
Below ‘bitrate’ and underneath ‘Keyframe Interval, you will find the ‘Preset’ option. I have this set at ‘Max Quality’. If you are having performance issues feel free to lower this, and play with it until you feel the issue has been resolved. When you are done here, click ‘apply’ and we will move on to audio.
Output Audio
Click ‘audio’ and adjust ‘Track 1’ to ‘160’ if you’re going to be doing any streaming.
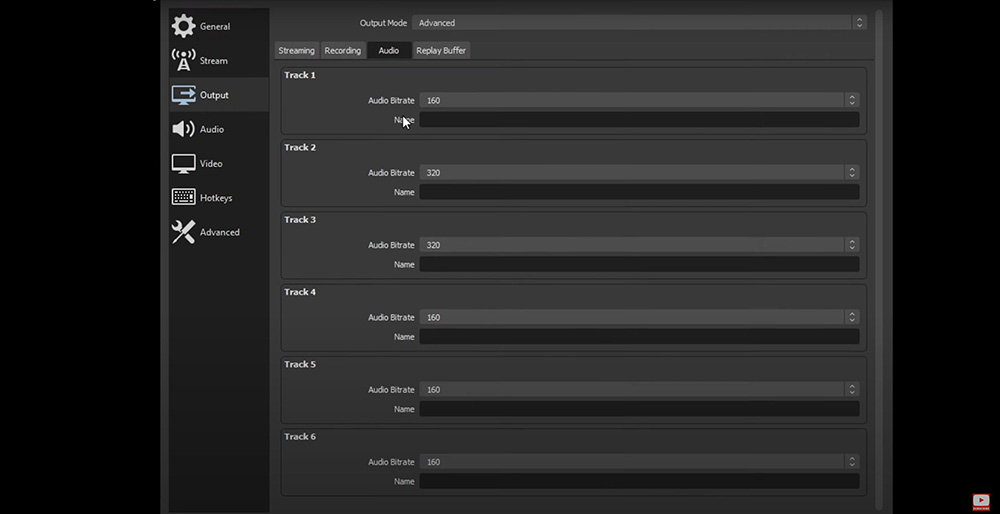
For tracks 2 and 3, we will set them as high as possible at ‘320’ because they are the two recording channels. For me, one will be my microphone and one will be my desktop audio. If you don’t have a microphone and are only recording desktop audio, don’t worry about the second track. The same will go for the check boxes we checked off earlier, you can uncheck one of them if you are only using desktop audio without a microphone.
Audio Tab
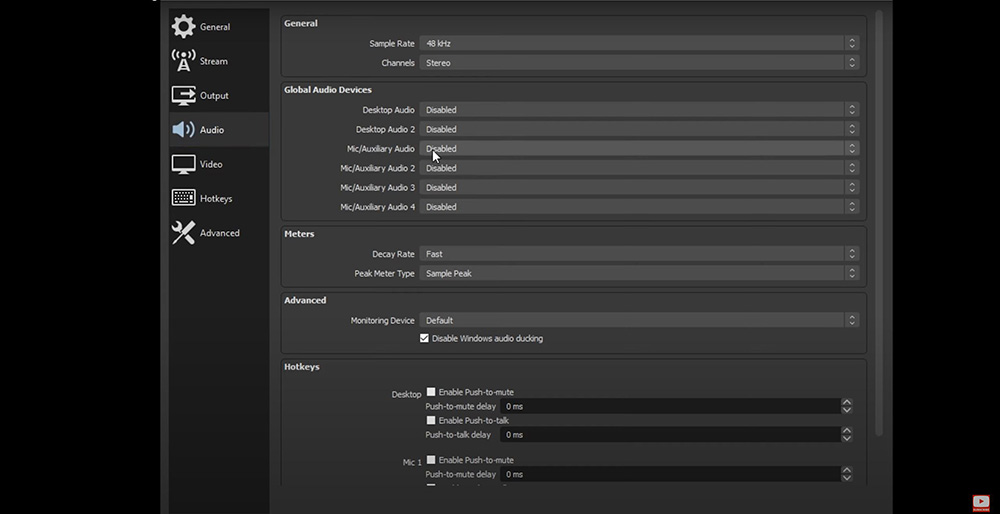
From here, we will move down to ‘audio’ underneath ‘output’ on the left hand side. I like to have all of these disabled, as I feel I have more control by turning on an off the audio from in the scene.
Video Tab
Resolution will be the first available option to change. Change both ‘Base’ and ‘Output’ to what your actual monitor resolution is.

The ‘Downscaling’ tab can be left as is, and you can move on to ‘Common FPS Values’. Depending on how many frames per second you want to record at, that is the number you will put here. If you are recording at 60fps, you will put 60 here. YouTube can actually play at 60fps, so it is nice to record at 60fps for the viewer.
Create Your Scene
Now, I will take you through actually creating your own scene. First go down to the plus sign and, click it, and name your scene.
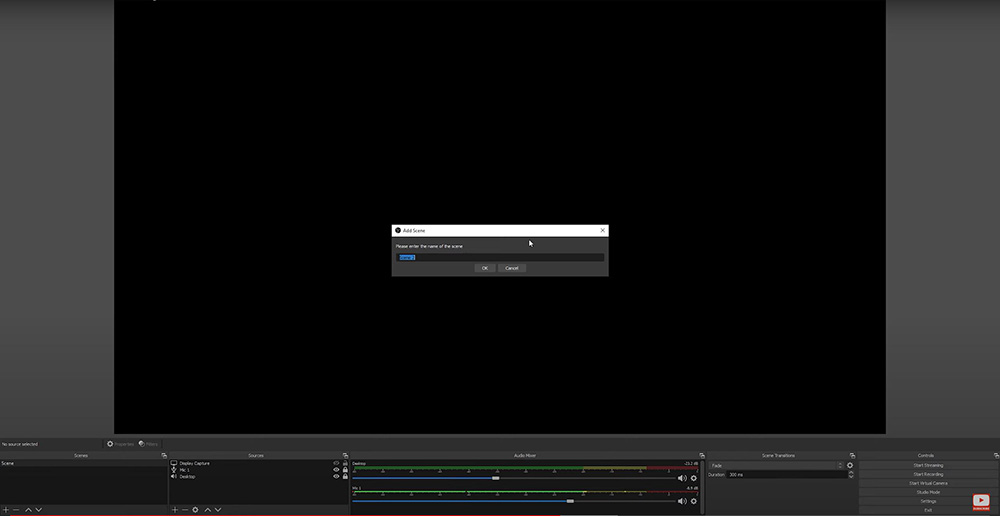
To start, I am going to add some inputs into the scene. First, go down to the plus sign, and add in a ‘display capture’. ‘Display capture’ is a little less finicky than ‘game capture’.

*To shut off mics or any input just click on the ‘eye’.*
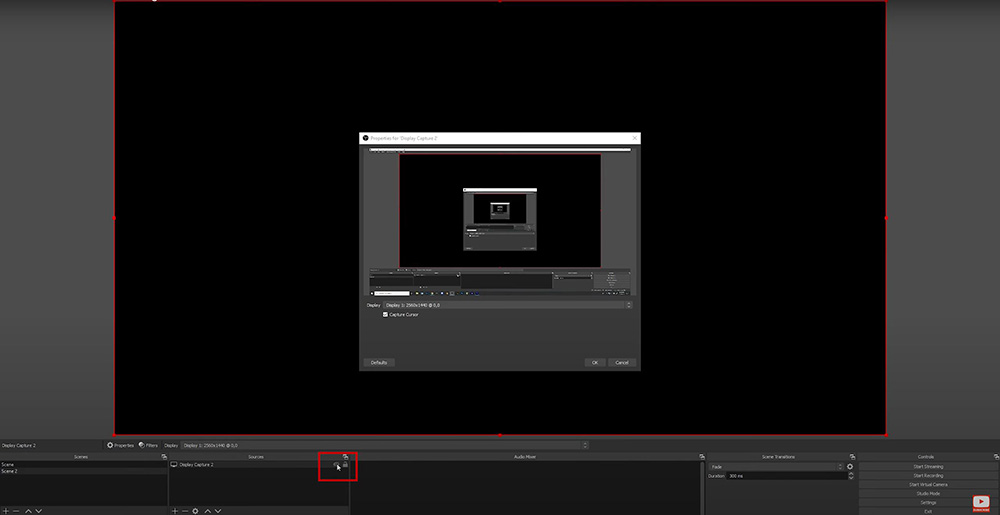
Choose the monitor that you want to use to record. You can choose not to allow it to record your cursor by unchecking the cursor box. .
Audio Output Capture
Next we will go to ‘audio output capture’, give it a name and choose the device that’s playing the audio from Microsoft Flight Simulator 2020 (the same would also work for x-plane). Make your selection and click ‘OK’. If you’re not running a mic, this is all you’ll need here in source section.
Add A Mic
First, you will add in your ‘audio input’, and give it a name. Next, you will go to ‘devices’ and choose your microphone. Our mic is now added.
Advanced Audio Properties

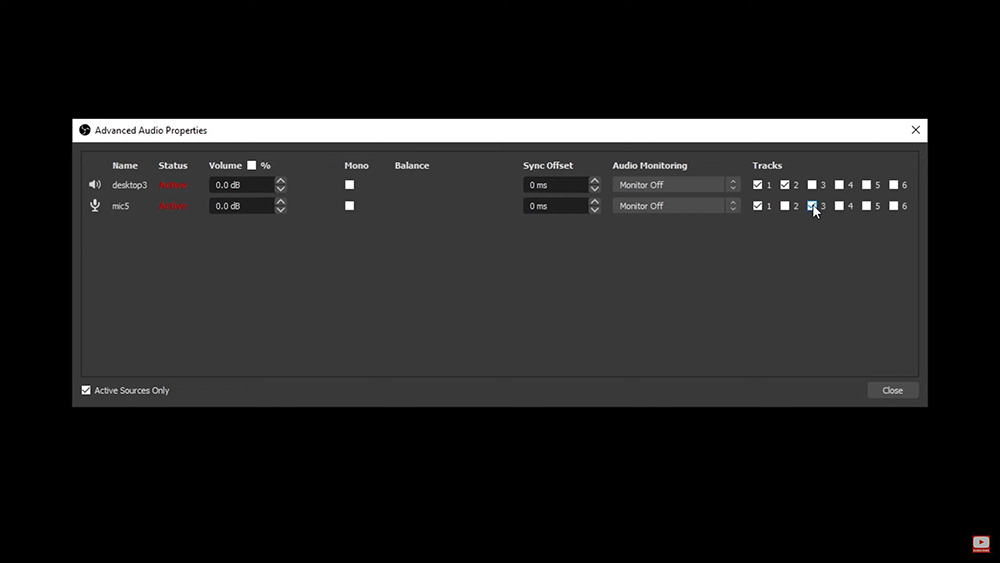
As shown in the above picture, you will click on the cog and go to ‘advanced audio properties’. From here, we’re going to uncheck some boxes.
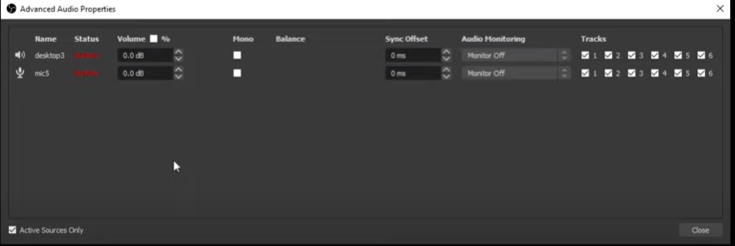
All of these boxes are tracks. One through six are checked off. If you are using the microphone, it will be displayed on the left side of this menu along with desktop audio. In which case, you will uncheck tracks 4, 5, and 6. If you are not using the mic, you will also uncheck 3. These tracks also coincide with the boxes we checked off earlier in the tutorial in the recording settings.
We want to keep ‘1’ checked off here because it will be going to our streaming track if we are streaming. In track ‘2’ we don’t want both the desktop and the microphone to go to the same track. So we will keep the top ‘2’ track checked off for the desktop, and uncheck the bottom ‘2’. And, we will do the opposite for track three, for the microphone. Uncheck the top ‘3’ and check the bottom ‘3’. Remember, this is only if you are using both the desktop audio and a microphone.
Start the Recording
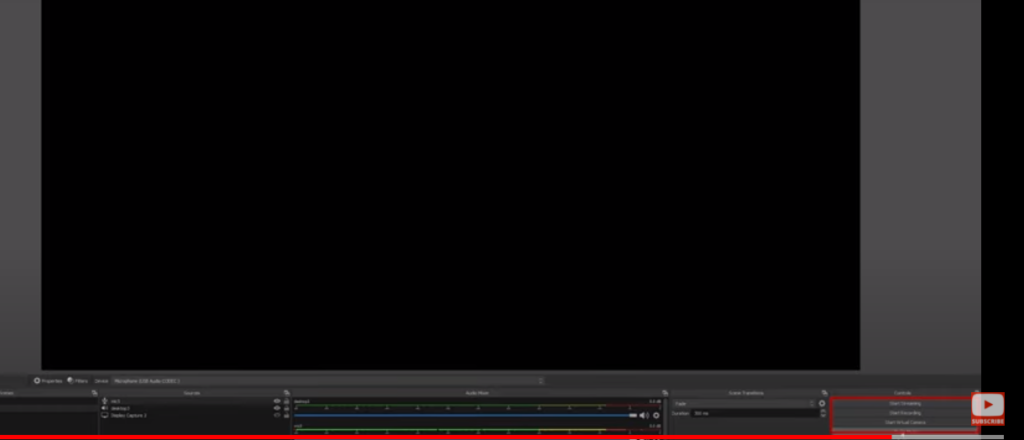
After closing the ‘advanced audio properties’ we can come down to the bottom right and click ‘start’ to start recording.
If you try to load this program and Microsoft Flight Simulator 2020 at the sametime it is usually too much for the computer and the computer will crash. So, either have this recording and running before you start Microsoft Flight Sim 2020 and come back and edit it later. Or, don’t start recording until Microsoft Flight Sim 2020 is already loaded up and running smoothly.
Platinum Membership
If you enjoyed this content, you should consider signing up for the Platinum Membership. It will give you access to tips and tutorials about editing, recording and anything else I have learned.
Hope this tutorial helped. Take care and keep flying!
Dan
Leave a Reply