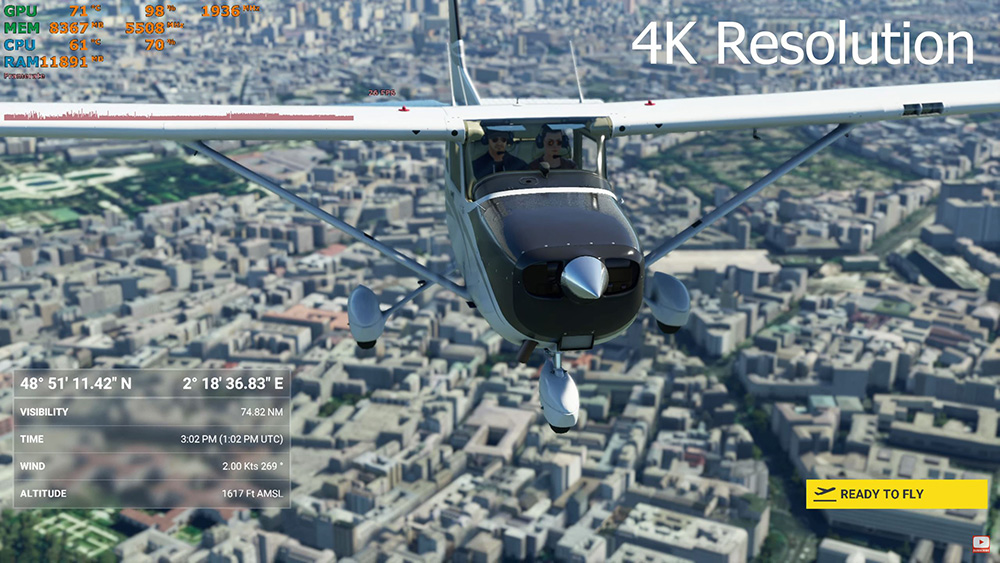
In this post I am going to discuss the building detail setting in Microsoft Flight Simulator 2020.
My Performance Test
To test performance I load the screen, which is running the sim in active pause. This mode allows me to avoid any other variables. I change my setting one by one and then I use the benchmark software to record the average frame rates.
My other settings are set fairly low to prevent the system from being maxed out. I run each test for five minutes. When running my test, my low results were an average of 66.6fps, medium was 66.1fps and high was 64.4fps. Ultra was 63 frames per second.
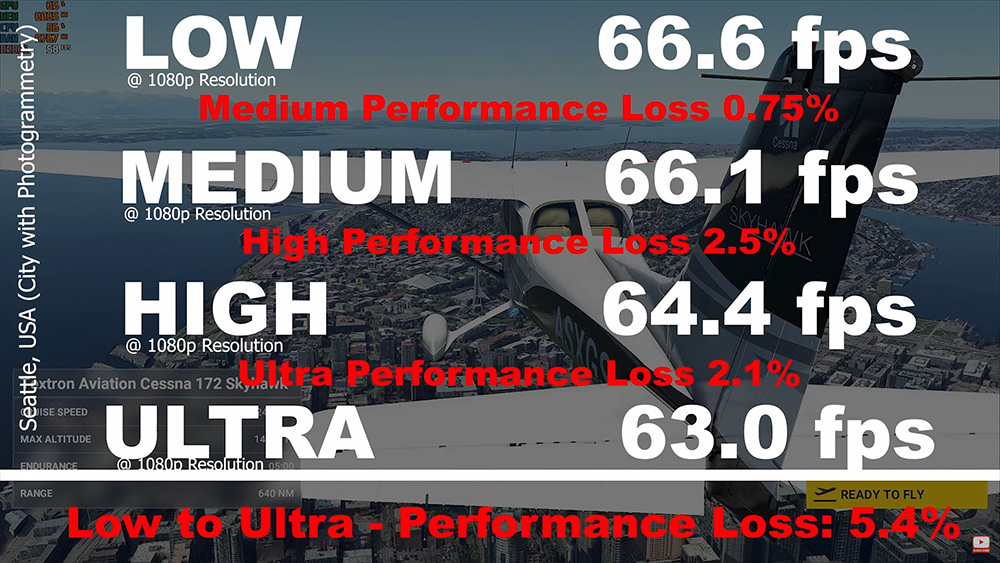
Between low and medium there was a 0.75% loss of frame rate, very small. The difference between low and high was higher and had a larger impact at 2.5%. Between high and ultra I saw a difference of 2.1%, and a total of 5.4% between low and ultra. Keep in mind that this can and will vary from system to system when applying this to your own computer.
My system is an i5 7600k cpu. It is overclocked to 4.7 gigahertz and my graphics card is 1080ti, and I am running with only 16GB of ram. My cpu is definitely my bottleneck as it is only four cores. From what I can see, Microsoft Flight Sim likes to have more than four cores.
Testing in 1080p
The last test was great for showing the impact even when it comes to cities with photogrammetry, however this setting plays a bigger role when it comes to cities without.
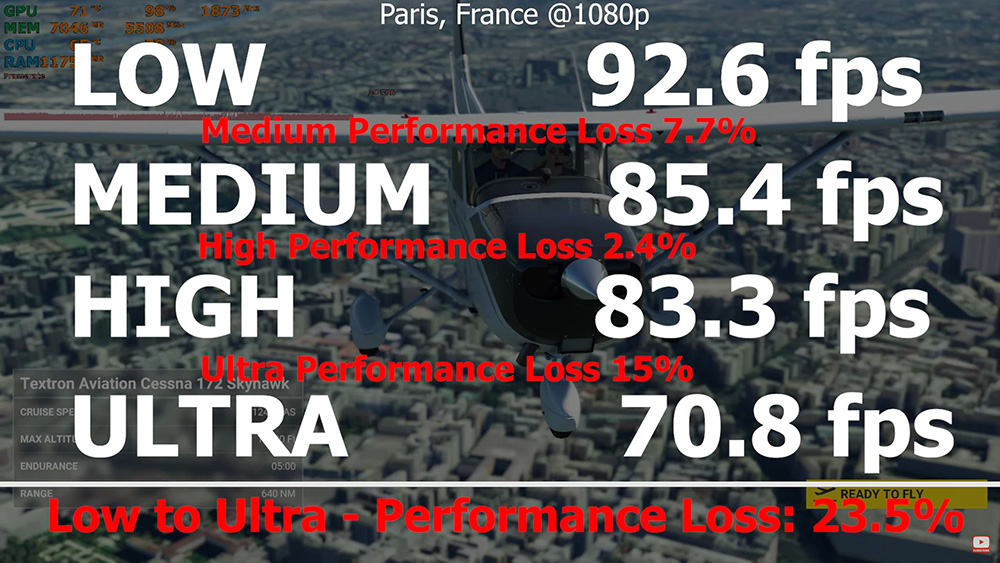
These test results come from Paris near the Eiffel Tower. My low average was 92.6fps, medium was 85.4, high was 83.3, and ultra was 70.8fps. Between low and medium I got a 7.7.% loss of frame rate, between medium and high 2.4% loss, between high and ultra a 15% loss, and lastly a 23.5% drop in frame rates between low and ultra.
As you can tell, in a city without photogrammetry, I did have less of an impact. Although, the frame rate was worse overall.
Testing in 4k
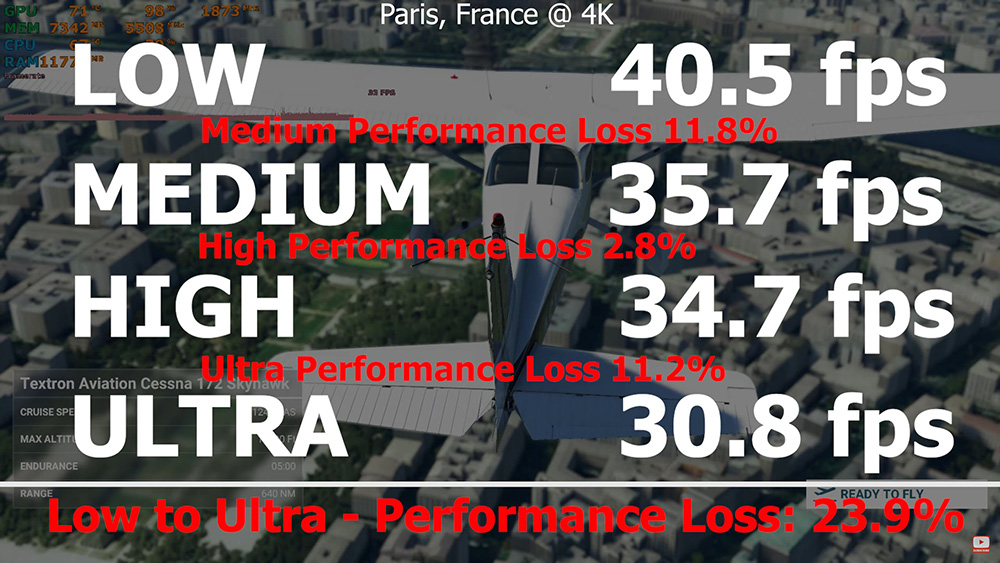
In 4k your graphics card really gets a workout. The results here are 40.5fps in low, 35.7fps in medium, 34.7fps in high, and 30.8fps in ultra. There was an 11.8% loss of frame rate between low and medium, a 2.8% loss between medium and high, and an 11.2% loss between high and ultra. The difference between low and ultra is a total of 23.9%.
Although your individual results may vary, it seems to stay consistent that this setting has a significant impact in a dense city as long as you’re not in a photogrammetry city. There is an impact, but less so than it would be in a different city.
Terrain Level of Detail
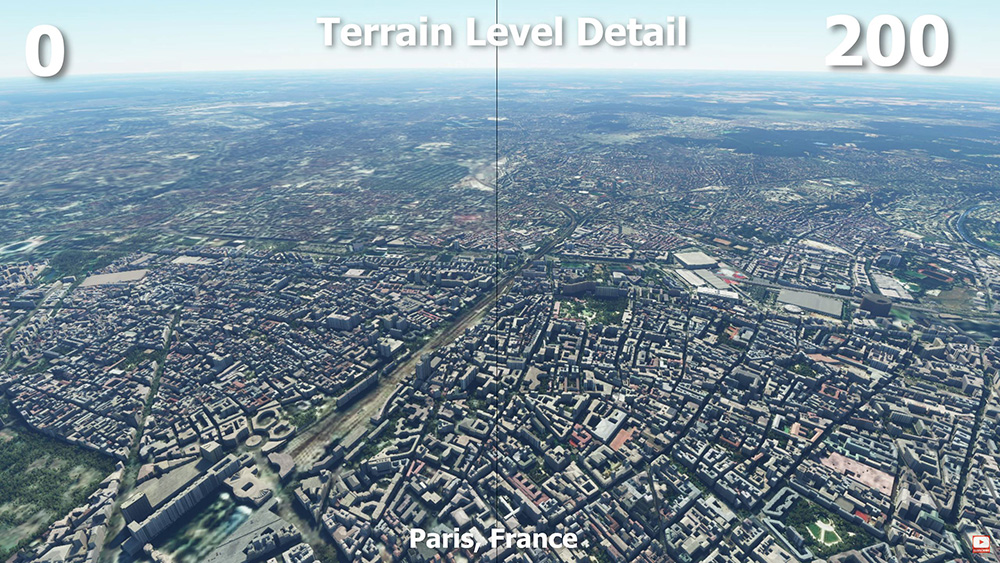
Lowering the ‘terrain level of detail’ setting can have a big impact on the visuals as well as performance. It lowers the draw distance for your buildings as well as other scenery.
Building Settings Graphic Comparisons
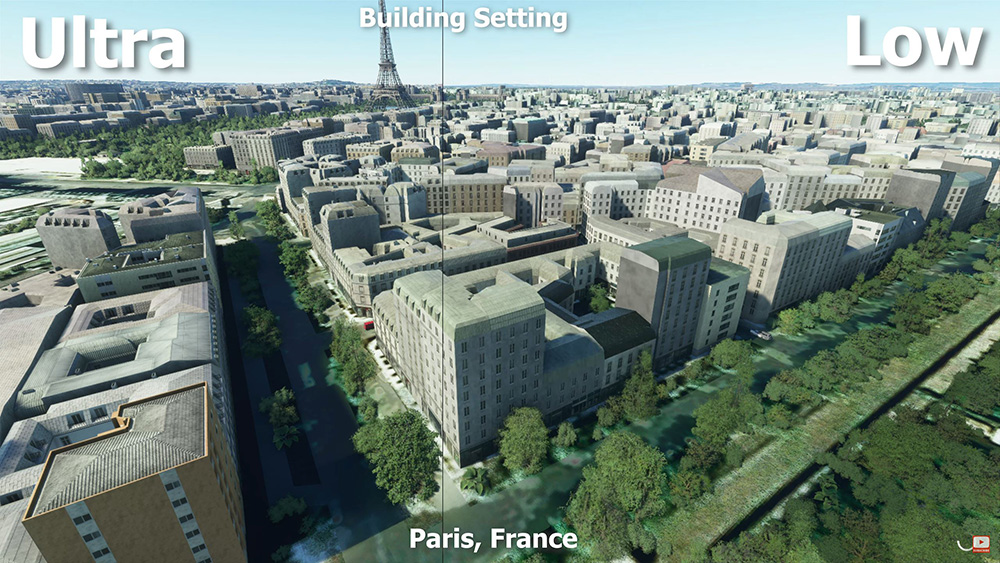
If you change your building settings from ‘low’ to ‘medium’ you will see the graphic detail will get sharper. However, if you change to ‘high’ you’re not going to get as many details in the buildings in the front. In the ‘high’ setting, you will start to see the buildings in the distance start to change.
What’s happening is, it is pushing back that detail level further and further. It is creating a different draw distance.
In ‘ultra’, you can see little changes and details being added quite a ways into the distance. From the air, a lot of these tiny changes will probably not be noticeable. Still, if you are on ‘low’ the sim will put less detail in the further you are away.
Graphic Comparisons at Higher Altitude
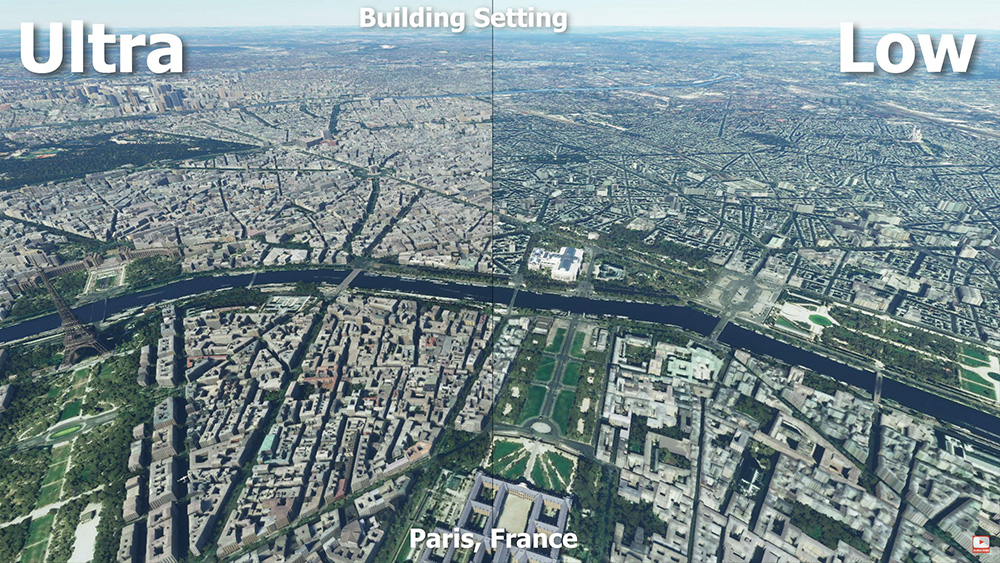
When you’re in a city without photogrammetry, at a higher altitude, you can notice the difference between ‘low’ and ‘medium’ is that the details of the buildings get filled in to a point that is much more noticeable. When you change from ‘medium’ to ‘high’ there is a lot less difference however. And even less of a difference with ‘ultra’. You would have to pay very close attention to the buildings to notice the differences.
Ultra does fill in a lot of extra scenery in the background, so it can make a difference depending on the type of scenery you are flying in.
When running in photogrammetry you can probably get away with running in ‘low’.
Comparison from Ultra to Low
When going backwards in comparison from ‘ultra’ to ‘low you can begin to see the differences. Everything starts out completely filled in, and then becomes very sparse. When you get to ‘low’ you also lose a lot of detail in the buildings up close. When you have it on ‘ultra’ they are very defined.
Custom Buildings
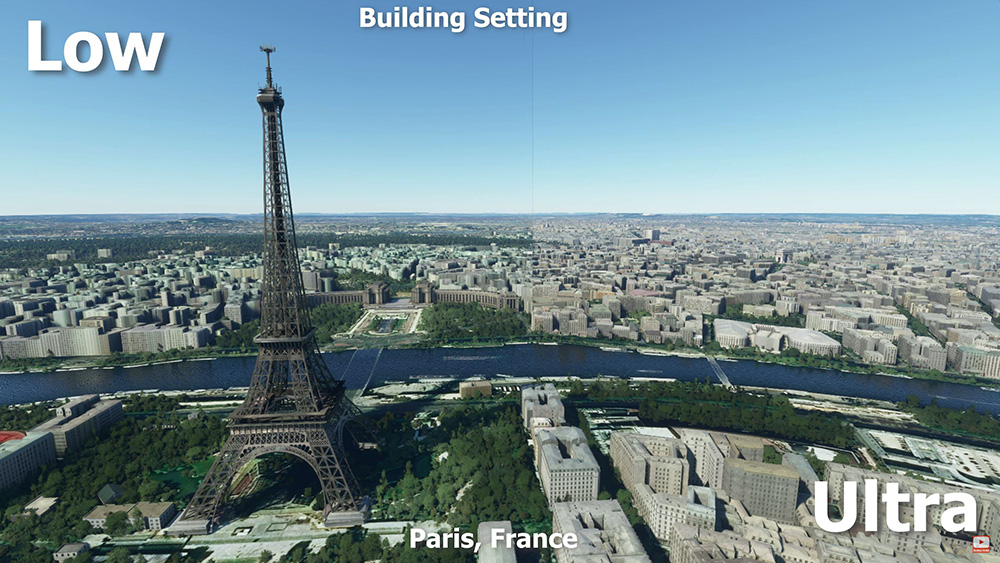
If you were looking at the Eiffel Tower and comparing ‘low’ to ‘medium’ you will notice there is not much of a difference. There is also not much of a difference between ‘medium’ and ‘high’. Even ‘high’ to ‘ultra’ has almost no difference.
Even with the only other option I know about in Microsoft Flight Sim, object detail, it seems this is the way their custom buildings are done. There may not be a way to change the detail for any of their custom buildings.
The Colosseum is a different story because you are dealing with photogrammetry. Here you will get a different effect because you are dealing with resolution rather than building detail.
Photogrammetry Cities
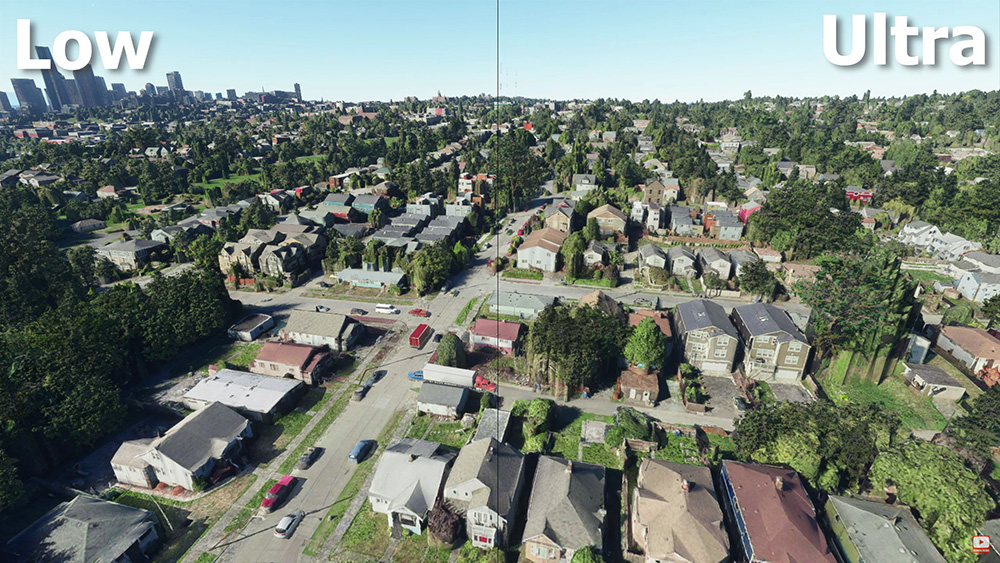
At a high altitude in the city of Seattle the difference between ‘low’ and ‘high’ will be noticeable because you are in another photogrammetry city. The differences between ‘low and ‘ultra’ here will not be that significant however if you really look at them.
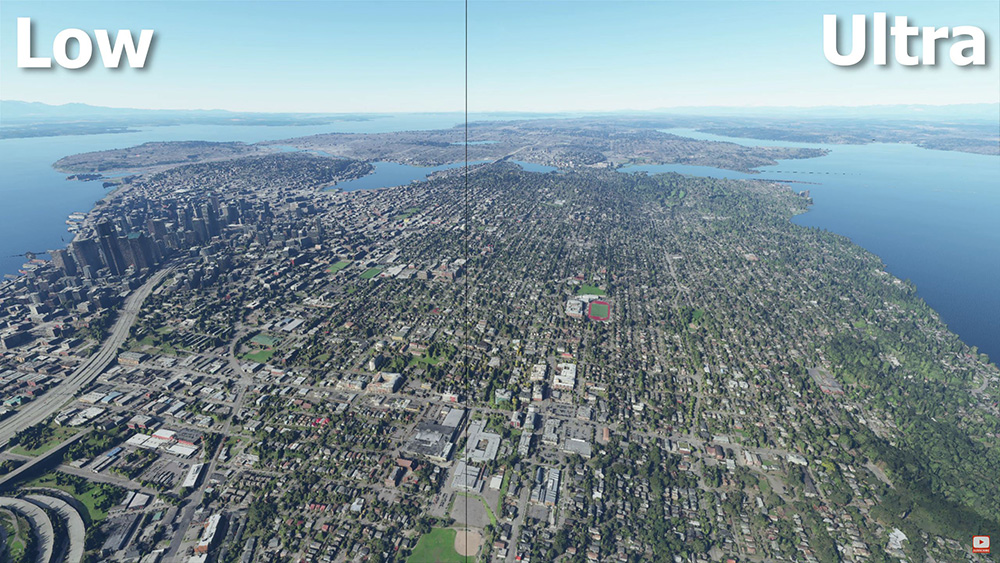
If you are interested in comparing more of the settings I suggest you take a look at one of the videos I have made that compares all the settings. That video has every setting separated into different chapters.
I hope this was helpful. Keep flying!
Leave a Reply